






Projects › Roof Waterproofing
You don't need to find the leak. You need to stop looking for it.
A roof leak almost never shows up where it gets in. Coat the whole surface and the search stops mattering — we'll size the membrane and pick the right prep for what your roof is made of.
A weekend, not a re-roof
Four steps. No leak-hunting.
You coat the whole surface, so you never have to find the entry point. The two things that decide the outcome are the prep and the seams.
Clean it properly
Remove debris, moss and loose granules, then use the cleaner pair matched to your surface. Rinse well and let it dry completely.
Reinforce every seam
Coat the seam, lay Fabric Reinforcement into the wet coating, coat over it. Every lap, edge, fastener line and penetration. This is where roofs leak.
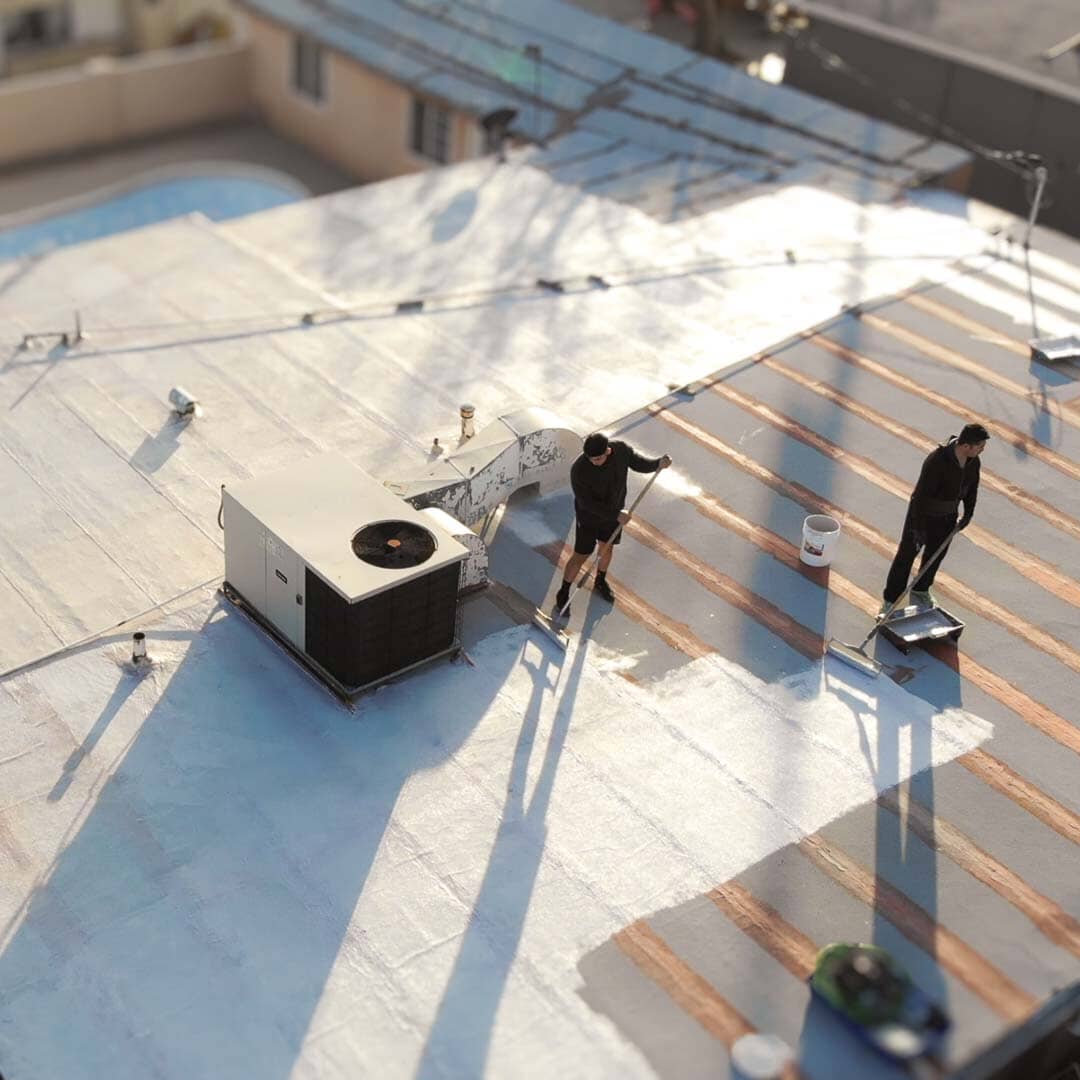
Roll two coats
½" nap roller on an extension pole, thin and even. Second coat perpendicular to the first. Coat the whole surface, not just the suspect area.
Give it a dry window
Dry to touch in about an hour, initial cure at least 7 days — longer with thick coats or high humidity. Apply between 50–85°F — out of direct sun — and check the forecast before you start.
Don’t skip the fabric on seamsThe membrane is strong across a flat field. It needs reinforcement where two things meet or something penetrates the surface — one customer coated a re-decked garage roof without it, had three small leaks, and stopped them with a further coat using fabric.
Your roof
What does your roof need?
Tell us the surface and the area. We’ll size the membrane and pick the right prep cleaners — using the wrong pair is the most common reason a coating lifts.
Length × width of the roof footprint. Tick corrugated above if it applies.
Pick your surface and enter the area — we’ll work out exactly what the job needs.
Untick anything you already have. Quantities are editable.
Will it stick to mine?
Seven surfaces. The prep is the condition.
It bonds to all of these — provided the surface is cleaned with the right pair first.
Flat and low-slope rubber roofs, including old ones that have gone chalky.
Prep B: Power Cleaner + Stone SoapIncluding shallow-pitched shingle roofs where water gets under the tabs and through the nail holes.
Prep B: Power Cleaner + Stone SoapAged modified-bitumen and rolled roofing, once loose granules and moss are removed.
Prep B: Power Cleaner + Stone SoapStanding seam, panel and corrugated. Seals fastener penetrations and lap joints — the two places metal roofs let go.
Prep D: Nu-Lift + Stone SoapFlat concrete decks over living space, including previously sealed surfaces once the old coating is sound.
Prep D: Nu-Lift + Stone SoapPinholes, rust perforations and seam splits. Use fabric under the coating for anything more than a pinhole.
Prep D: Nu-Lift + Stone SoapBare or repaired decking, including replaced sections.
Prep E: sand with 60-grit — no cleanerA structurally failed roof, rotted decking, or an active flowing leak during rain. Repair the structure first — a coating seals surfaces, it doesn’t rebuild them.
Real roofs
People who stopped looking for it.
Selected from 160 roof reviews, with the owners’ own photos.
“I went inside and closed the door… it was pitch black.”
I used this product to cover every single screw head on the tin roofs of a storage facility. Every. Single. One. Bought two 5 gallon tubs to cover both buildings (approximately 265ft long by 35 wide) and had half a tub leftover. Afterward I went inside one of the storage units and closed the door to see if I could still see spots of sunlight peeking through the holes… and it was pitch black! Winter has since hit and there have been no leaks.
“It worked really well to keep the roof from leaking.”
We used this product on the roof of one of our office buildings in Nevada. It worked really well to keep the roof from leaking.
“A leak that was impossible to locate.”
I had a leak in my roof that was impossible to locate. We rolled out three layers of Liquid Membrane all around the HVAC unit and all the comp. shingles from the unit down to the roof edge. First big rain and no leaks. This stuff is very easy to use and very effective!
“It didn’t take any extra handyman skills.”
We have a little concrete roof above our main entrance that has been leaking. So my husband bought this few months back and waterproofed it. It didn't take any extra handy man skills to apply it and it's been holding up really well.
“Three years since the last application.”
I applied the Liquid Membrane on my metal roof, as per advice by my contractor. It's been 3 years since the last application and still working very good. Awesome product and great customer service too!
“The other product had peeling issues after a year.”
I was looking for a waterproofing membrane that can withstand direct sunlight. I live in Florida. I tried using the other product, but it had some peeling issues after a year. After doing some research, I purchased 5 gals and applied it using a nap roller.
Why patching keeps failing
The stain is never above the hole.
Roofs don’t fail in the middle of a panel. They fail at the joins — seams, laps, fasteners, flashing, and the penetrations around vents and units. Once water gets past one of those it runs along the underside of the deck, follows a rafter, and drips through the ceiling wherever the lowest point happens to be. By the time you see it inside, the entry point can be several metres away.
Then thermal movement finishes the job. A roof swings dozens of degrees between a winter night and a summer afternoon, every single day. Rigid patches and tapes are fixed to a surface that never stops moving, so they crack and lift — usually right next to the last repair.
The full version
Detailed application instructions.
The four steps above, with the detail you’ll want while you’re on the roof. Open what you need.
01 Clean the surface
Every surface needs the right cleaner pair. The calculator above picks it from your answer — but here is the rule.
- EPDM, rubber, shingle, torch-down — Prep B: Power Cleaner then Stone Soap. Power Cleaner cuts through grease, weathering and chalk; Stone Soap clears the residue and rebalances the surface pH.
- Metal, concrete decks, gutters — Prep D: Nu-Lift then Stone Soap. Nu-Lift chemically etches the surface and lifts oxidation; Stone Soap clears the residue and rebalances the surface pH.
- Plywood or timber — Prep E: sand with 60-grit. No cleaner; wood absorbs water.
- Unknown coating — Prep C: Power Cleaner then Nu-Lift.
- Clear debris, moss and loose granules first.
- Apply the cleaner, work it in with a stiff brush, rinse thoroughly.
- Follow with Stone Soap — it clears the residue and rebalances the surface pH — then rinse again.
- Let it dry completely before you coat.
02 Reinforce every seam and penetration
You’ll need: Fabric Reinforcement · Liquid Membrane
Roofs leak at joins, not in the field. Treat every one of them before you coat the surface.
- Apply a generous coat of membrane along the seam, lap, edge or around the penetration.
- Lay Fabric Reinforcement into the wet coating and press it flat.
- Wait 10–15 minutes.
- Coat over the fabric to fully encapsulate it, and let it dry to touch.
03 Roll two coats over everything
You’ll need: Liquid Membrane · ½" nap roller · extension pole
- Check the reinforced areas from step 2 are fully dry.
- Stir the product well — pigments settle, and unstirred product gives uneven color.
- Apply a thin, even coat across the entire surface.
- Recoat when it holds no fingerprint — roughly 25–45 minutes at 72°F.
- Second coat perpendicular to the first. Both coats the same day.
- Inspect for pinholes and thin spots; it dries lighter, which makes them easier to see.
04 Cure — and watch the forecast
Dry to touch in about an hour. Initial cure is at least 7 days — longer with thick coats or high humidity. Apply between 50–85°F, out of direct sun.
| Coverage | ~200 sq ft per gallon at 2 coats |
| Recoat window | When it holds no fingerprint — same day |
| Initial cure | 7 days minimum · longer if thick or humid |
| Temperature | 50–85°F · out of direct sun |
| Corrugated metal | Add ~25% for profile |
| Cleanup | Warm water, straight after use |
Before you start
Additional information.
The manufacturer notes that decide whether this goes well. Most of the problems people report trace back to one of these.
Stop searching for it. Seal the whole roof.
If you’ve patched it more than once and it keeps coming back somewhere new, the problem isn’t your patching. It’s that you’re still looking for a single hole.
Size my roofRoof questions
The ones worth asking.
I can’t find the leak. Will this still work?
That’s the main reason people use it. Because you coat the whole surface rather than a suspected spot, you don’t need to locate the entry point — and you can skip the two-person hose test entirely.
Can I apply it over my existing roof?
Yes, on EPDM and rubber, asphalt shingle, torch-down and bitumen, metal, concrete roof decks, gutters and valleys, or plywood and timber decking, provided it’s cleaned with the right pair first and the existing surface is sound. What it can’t do is fix rotted decking or structural failure.
My metal roof is corrugated. Does that change anything?
Yes. Corrugated profile has meaningfully more actual surface than its flat footprint, so plan on roughly 25% more material. Tick the corrugated box in the coverage calculator on the Roof Waterproofing page and it adjusts for you.
My roof already has a coating on it.
In the Roof Waterproofing page calculator, choose “already coated, chemistry unknown” and you’ll get Prep C — Power Cleaner then Nu-Lift, designed for non water-based or unknown coatings. The exception is silicone, where adhesion can be unreliable; test a small area first.
Do I really need the fabric?
On seams, laps, edges, fasteners and penetrations, yes. That’s where roofs leak. It’s pre-ticked in the Roof Waterproofing page calculator for that reason.
Does the color matter?
For heat, yes. White tests at SRI 64 under ASTM E1980, against roughly 20 for a typical black asphalt roof — so a white roof reflects considerably more solar heat into the sky rather than into the building.
Will it stop water that’s already coming in?
It has to go on a dry surface, so you can’t coat during active leaking. Wait for a dry spell, clean, coat, and give it the cure window.
Will it seal metal roof seams and fastener heads?
Yes — those are the two places metal roofs let go. Clean with Prep D (Nu-Lift, then Stone Soap), which also etches the metal so the membrane bonds. Press Fabric Reinforcement into the first wet coat over seams, laps and fastener lines, then roll two coats over the whole roof. Apply on a dry day, never during an active leak.
Do I need to prime a rusty metal roof?
No primer, ever — prep does that job. Scrape or wire-brush loose and flaking rust back to sound metal, then use Prep D: Nu-Lift etches the metal and lifts oxidation, and Stone Soap removes the residue. Let it dry fully before coating. Metal rusted through needs patching or replacing first.
Roof cement or caulk vs a full coating — which lasts longer?
Caulk and roof cement are spot fixes, and they harden and crack at exactly the joints that move. A flexible membrane over the whole roof keeps moving with it, and because it covers everything you don’t have to find the leak first.
Not sure it’s right for your roof? Call 1-833-211-2297 — the team will tell you honestly if you need a roofer instead.