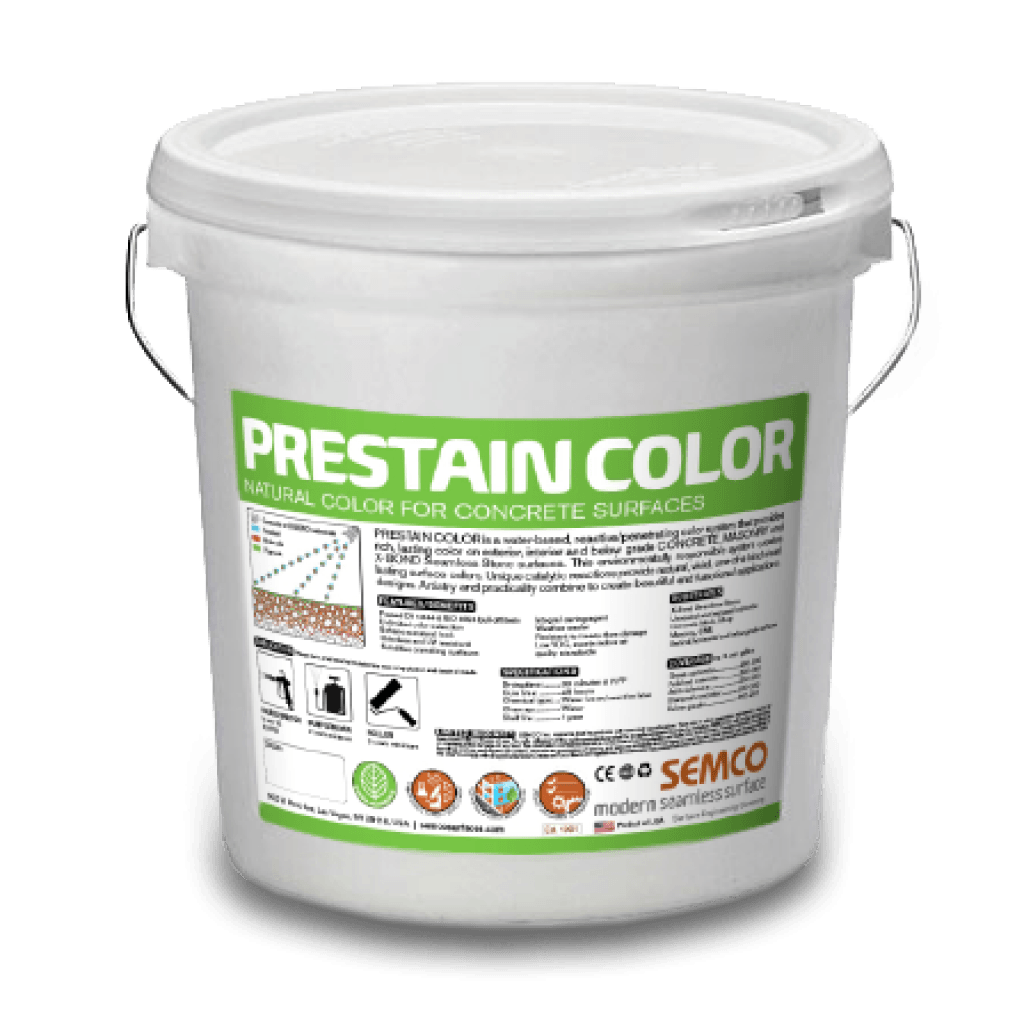
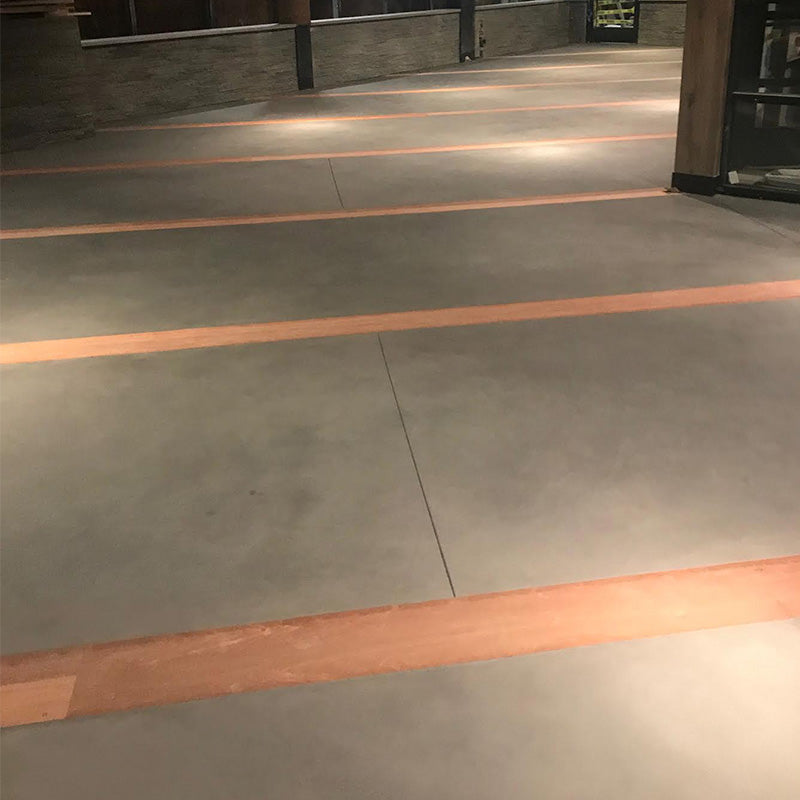
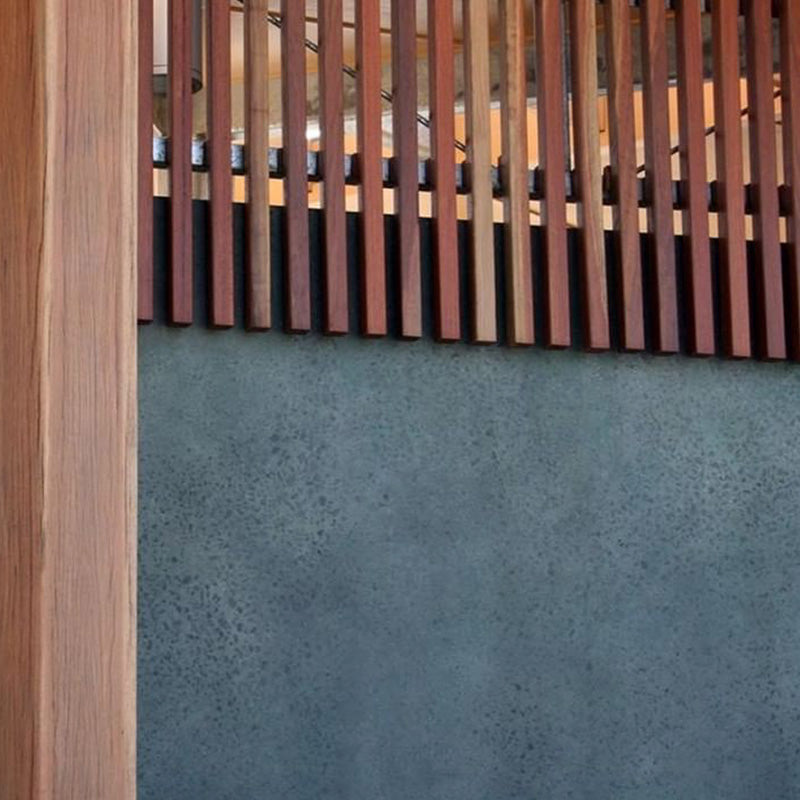
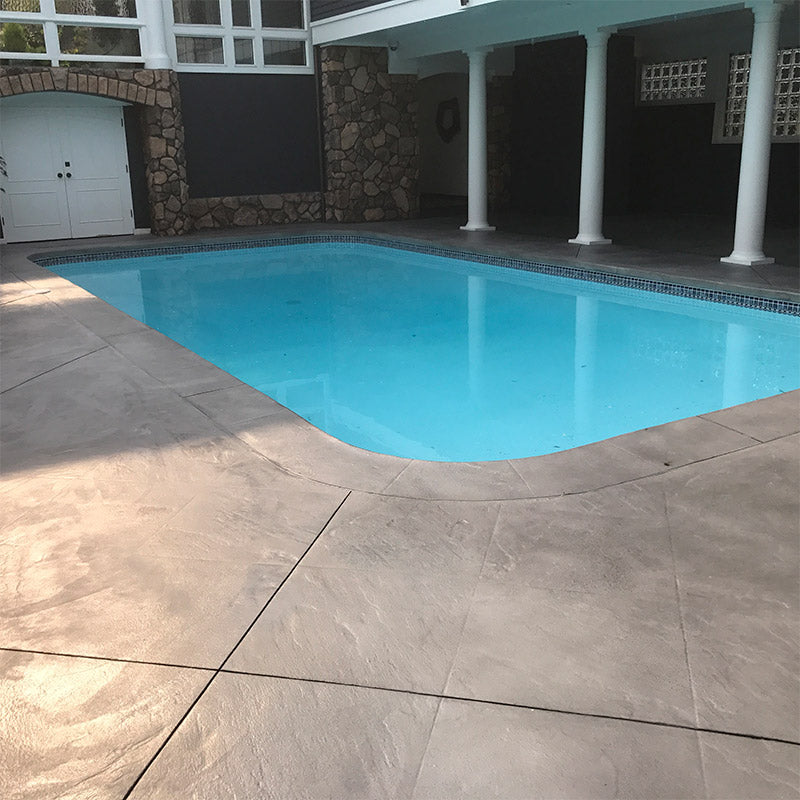












PreStain Color
Size
PreStain Color
1 Quart (50-75 sq ft @ 2 coats) / PS Montego Stone
3620 W Reno Avenue
3620 W Reno Avenue
Las Vegas NV 89118
United States
- Ready to use water based stain
- Coverage : 200 - 300 sq ft /gallon @ 2 coats
- Easy to apply : airless sprayer, pump sprayer or roller
- Substrates: Unsealed Concrete, Exposed Concrete, Concrete Block, Wood Surfaces, CMU Masonry, Vertical, horizontal and below grade surfaces
- Solidifies crumbling surfaces
- PreStain Color has been specially formulated to produce a most durable UV fade resistance
- Formulated to produce a durable alkali resistant surface
- With its fast drying properties, PreStain Color ensures a quick application time and allows your surface to be walked on within a matter of hours
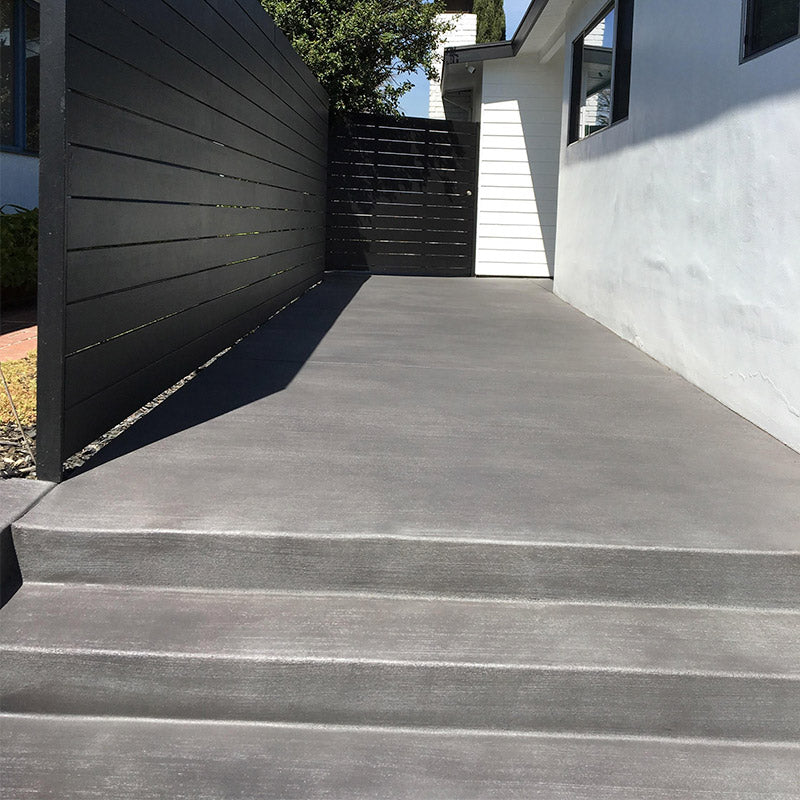
Lasting Color For Your Surface
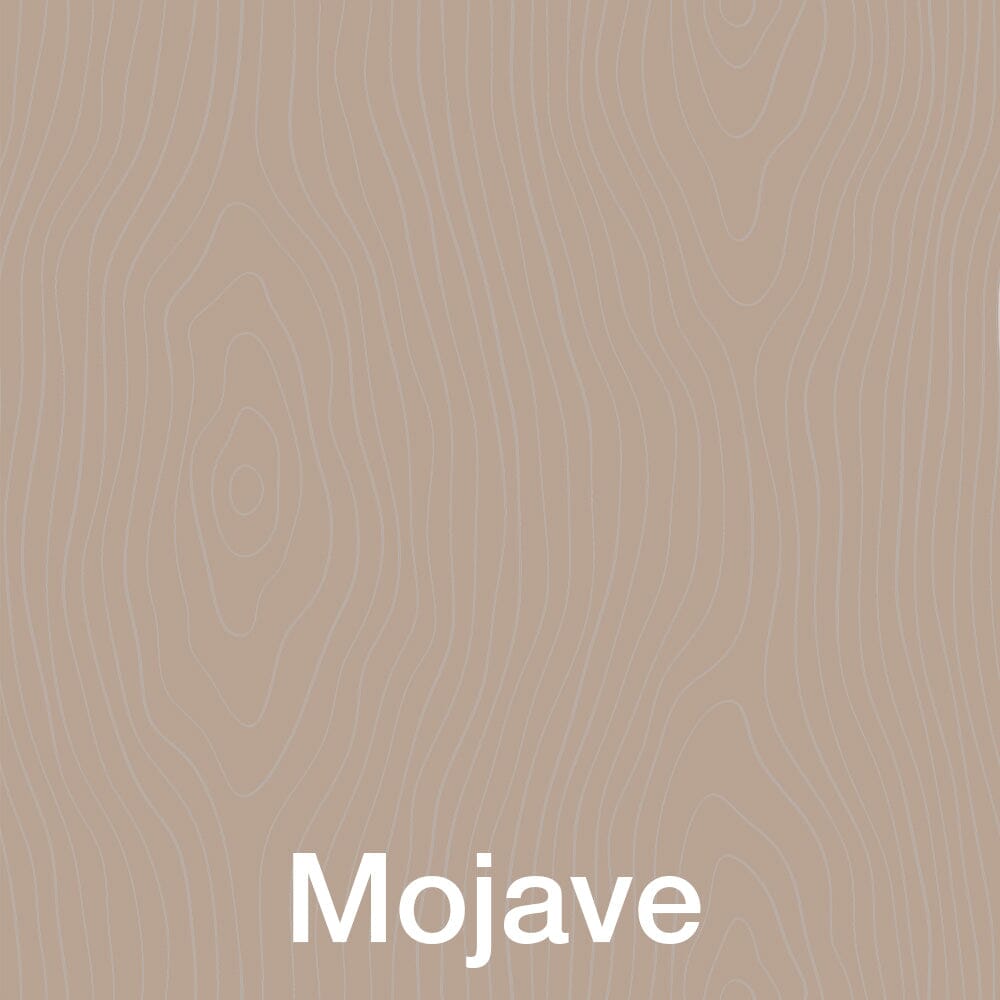
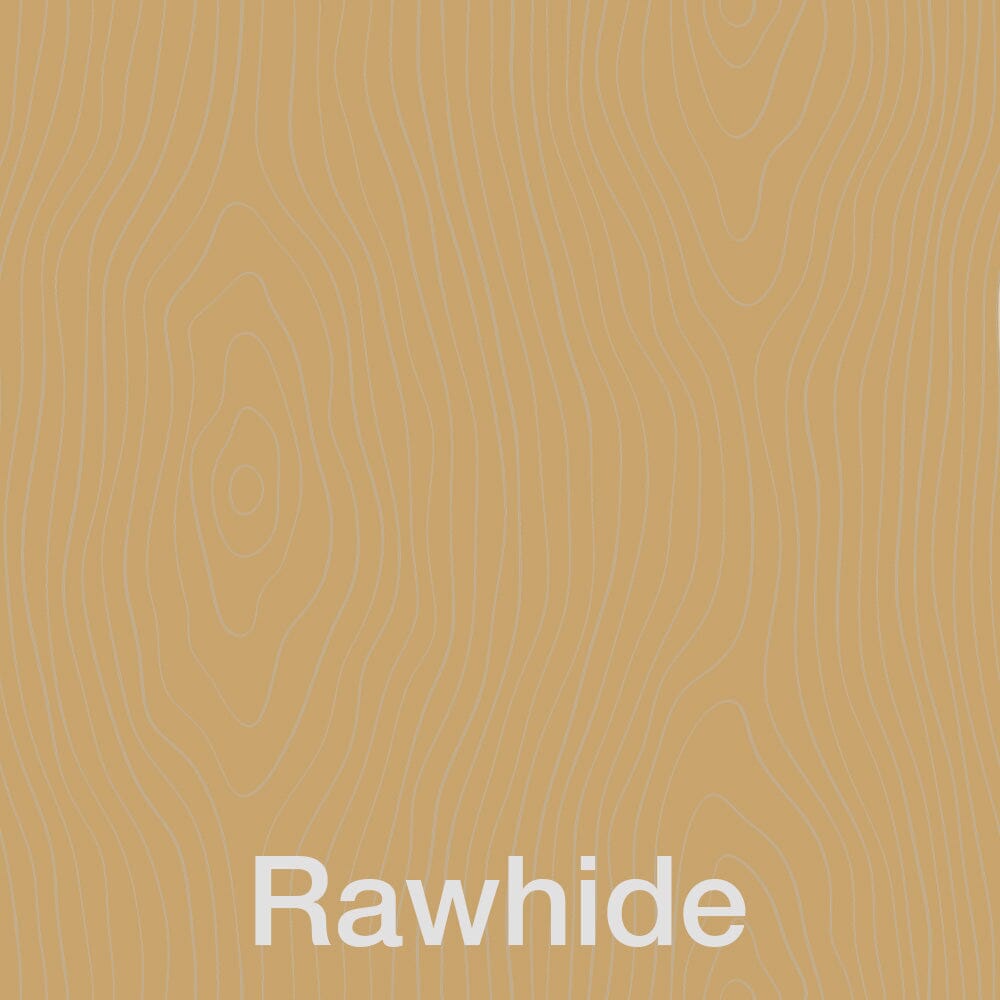
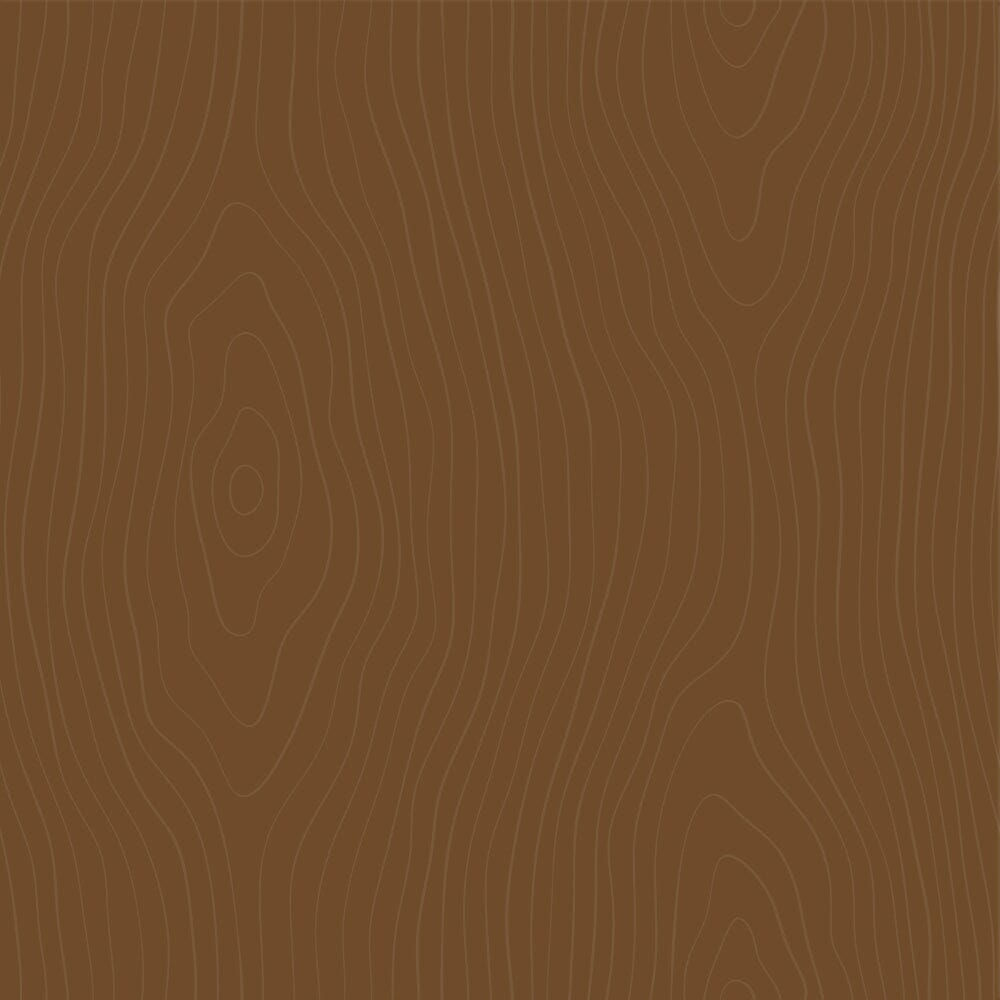
Here are the available colors of SEMCO PreStain - All colors are UV-stable Due to Computer Monitors, Colors may not be exactly as shown. Also depending on the original color of your substrate, end result in color may vary.
 Curing Times

FOR STEP-BY-STEP GUIDES SPECIFIC TO YOUR PROJECT
Prepare your surface and Gather your materials
• For concrete or brick surfaces we recommend our Preparation D in order to remove any mineral deposits or efflorescence from the surface. For this you will need the following cleaners : Nu-Lift Cleaner and Stone Soap • If there is constant dampness in the substrate, use Natural Shield first to mitigate the moisture. Let it fully cure first prior to applying SEMCO Liquid Membrane™ . Ensure your surfaces are fully cleaned and dried. Gather all the products and tools needed for your project.
Fabric Reinforcement
If you have any cracks wider than 1/4", a Fabric Reinforcement is needed to bridge the crack. Any cracks smaller than 1/4" width, SEMCO Liquid Membrane™ can be applied over it. To apply the Fabric Reinforcement, apply a generous coat of SEMCO Liquid Membrane™ over the crack. Put the Fabric Reinforcement on a press it flat, after 10-15 min apply another coat of SEMCO Liquid Membrane™ over the Fabric Reinforcement to encapsulate it. Let it dry to the touch before applying SEMCO Liquid Membrane™ over the entire surface.
Masking
Mask off areas that are not receiving any coating. Remove masking tape before material has fully cured.
APPLYING COAT
Use a 1/2" nap roller. Allow any pre-treated areas to fully dry. Apply a thin coat (0.015 inch per coat) of SEMCO Liquid Membrane™ with brush or roller over substrate including pre-treated areas. Once you can walk on the surface and not get any residue on your shoe or feet or cannot leave a fingerprint impression it is ready to re-coat. Apply another thin coat of SEMCO Liquid Membrane™ in an alternate direction over the first coat of SEMCO Liquid Membrane™. Let topcoat dry to the touch, approximately 1–2 hours at 70 °F (21 °C) and 50% RH. When last coat has dried to the touch, inspect final surface for pinholes, voids, thin spots or other defects.SEMCO Liquid Membrane™ will dry to a lighter color when it’s dry to touch. Use additional SEMCO Liquid Membrane™ to seal the defects. Required total thickness is 0.03 - 0.04 inches for non submerged applications.
Curing Time
Curing time depends on temperature, humidity and airflow, however typically initial cure is within 6 - 7 days as per specific product recommendations.
Additional Information
• For clean up use warm water to clean brush or roller right after use. • For optimal bonding we highly recommend preparing the surface as mentioned above for best results. • Stir up the product well before use in order to mix up the color pigments. • Avoid application in direct sun light in the afternoon or temperatures of over 85F as it might cause the product to dry too fast before it can adhere to the substrate • Suitable for light foot traffic.For heavy foot traffic or vehicle traffic, we recommend using SEMCO Titan Shield Gloss. • It can not be applied to wet substrates or substrates still containing moisture, else it will not cure correctly and stay tacky. Max. rest moisture in substrate can be up to 3%. If you are unsure about the moisture content, have it measured prior to application. • Ensuring that a surface is pH balanced before applying a coating is crucial for optimal adhesion and performance. Therefore we recommend our preparation methods for optimal adhesion. We do not recommend acid washes. • For applications where the product is fully submerged, 3 coats @20mil each is required and allow a curing time of minimum 6-7 days.Also application must coat entire surface to above the waterline. • Application on non porous surfaces such as metal or fiberglass : Apply thin coats as this will allow for the product to cure faster. • Cure times are displayed in our curing chart. However if coats have been applied too thick, the surface might feel tacky. This is a sign of trapped moisture. If you have left over product, apply a very thin coat over the entire surface. The surface needs to be fully cured and hard before permitting water. • For applications where SEMCO Liquid Membrane™ is applied on pool plaster, extended curing times might occur as plaster holds more moisture which needs to breath out first. A slight color change may occur when being in contact with water when the product has not fully cured yet. This however will not affect the performance of the SEMCO Liquid Membrane™. • It is always advisable to apply a small test patch in an inconspicuous are to ensure adequate adhesion prior to full application. • If you have multiple containers of SEMCO Liquid Membrane™, we highly recommend to either mix them together or use one container for the last layer to get color consistency.
Preparation
Sand the wood surface with a 60 grit sandpaper. Take off any loose coating and ensure surface is free of any debris
Masking
Mask off areas that are not receiving any coating. Remove masking tape before material has fully cured.
APPLYING COAT
Use a 1/2" nap roller. Allow any pre-treated areas to fully dry. Apply a thin coat (0.015 inch per coat) of SEMCO Liquid Membrane™ with brush or roller over substrate including pre-treated areas. Once you can walk on the surface and not get any residue on your shoe or feet or cannot leave a fingerprint impression it is ready to re-coat. Apply another thin coat of SEMCO Liquid Membrane™ in an alternate direction over the first coat of SEMCO Liquid Membrane™. Let topcoat dry to the touch, approximately 1–2 hours at 70 °F (21 °C) and 50% RH. When last coat has dried to the touch, inspect final surface for pinholes, voids, thin spots or other defects.SEMCO Liquid Membrane™ will dry to a lighter color when it’s dry to touch. Use additional SEMCO Liquid Membrane™ to seal the defects. Required total thickness is 0.03 - 0.04 inches for non submerged applications.
Curing Time
Curing time depends on temperature, humidity and airflow, however typically initial cure is within 6 - 7 days as per specific product recommendations.
Additional Information
• For clean up use warm water to clean brush or roller right after use. • For optimal bonding we highly recommend preparing the surface as mentioned above for best results. • Stir up the product well before use in order to mix up the color pigments. • Avoid application in direct sun light in the afternoon or temperatures of over 85F as it might cause the product to dry too fast before it can adhere to the substrate • Suitable for light foot traffic.For heavy foot traffic or vehicle traffic, we recommend using SEMCO Titan Shield Gloss. • It can not be applied to wet substrates or substrates still containing moisture, else it will not cure correctly and stay tacky. Max. rest moisture in substrate can be up to 3%. If you are unsure about the moisture content, have it measured prior to application. • For applications where the product is fully submerged, 3 coats @20mil each is required and allow a curing time of minimum 6-7 days.Also application must coat entire surface to above the waterline. • Application on non porous surfaces such as metal or fiberglass : Apply thin coats as this will allow for the product to cure faster. • Cure times are displayed in our curing chart. However if coats have been applied too thick, the surface might feel tacky. This is a sign of trapped moisture. If you have left over product, apply a very thin coat over the entire surface. The surface needs to be fully cured and hard before permitting water. • For applications where SEMCO Liquid Membrane™ is applied on pool plaster, extended curing times might occur as plaster holds more moisture which needs to breath out first. A slight color change may occur when being in contact with water when the product has not fully cured yet. This however will not affect the performance of the SEMCO Liquid Membrane™. • It is always advisable to apply a small test patch in an inconspicuous are to ensure adequate adhesion prior to full application. • If you have multiple containers of SEMCO Liquid Membrane™, we highly recommend to either mix them together or use one container for the last layer to get color consistency.
Prepare your space and Gather your materials
• For concrete or gunnite surfaces we recommend our Preparation D in order to remove any mineral deposits or efflorescence from the surface. For this you will need the following cleaners : Nu-Lift Cleaner and Stone Soap • For fiberglass surfaces it is required to sand the entire surface first with a 60 grit. Afterwards use Preparation B.For this you will need the following cleaners : Power Cleaner and Stone Soap • If there is constant dampness in the substrate, use Natural Shield first to mitigate the moisture. Let it fully cure first prior to applying SEMCO Liquid Membrane™ . Ensure your surfaces are fully cleaned and dried. Gather all the products and tools needed for your project.
Fabric Reinforcement
If you have any cracks wider than 1/4", a Fabric Reinforcement is needed to bridge the crack. Any cracks smaller than 1/4" width, SEMCO Liquid Membrane™ can be applied over it.
Masking
Mask off areas that are not receiving any coating. Remove masking tape before material has fully cured.
APPLYING COAT
|Use a 1/2" nap roller. Allow any pre-treated areas to fully dry. Apply a thin coat (0.015 inch per coat) of SEMCO Liquid Membrane™ with brush or roller over substrate including pre-treated areas. Once you can walk on the surface and not get any residue on your shoe or feet or cannot leave a fingerprint impression it is ready to re-coat. Apply another thin coat of SEMCO Liquid Membrane™ in an alternate direction over the first coat of SEMCO Liquid Membrane™. Let topcoat dry to the touch, approximately 1–2 hours at 70 °F (21 °C) and 50% RH. When last coat has dried to the touch, inspect final surface for pinholes, voids, thin spots or other defects.SEMCO Liquid Membrane™ will dry to a lighter color when it’s dry to touch. Use additional SEMCO Liquid Membrane™ to seal the defects. Required total thickness is 0.03 - 0.04 inches for non submerged applications. For submerged applications a min. required total thickness of 60 mil is required. Allow 6-7 days for full cure to filling with water.
Curing Time
Curing time depends on temperature, humidity and airflow, however typically initial cure is within 6 - 7 days as per specific product recommendations.
Additional Information
• For clean up use warm water to clean brush or roller right after use. • For optimal bonding we highly recommend preparing the surface as mentioned above for best results. • Stir up the product well before use in order to mix up the color pigments. • Avoid application in direct sun light in the afternoon or temperatures of over 85F as it might cause the product to dry too fast before it can adhere to the substrate • It can not be applied to wet substrates or substrates still containing moisture, else it will not cure correctly and stay tacky. Max. rest moisture in substrate can be up to 3%. If you are unsure about the moisture content, have it measured prior to application. • Ensuring that a surface is pH balanced before applying a coating is crucial for optimal adhesion and performance. Therefore we recommend our preparation methods for optimal adhesion. We do not recommend acid washes. • For applications where the product is fully submerged, 3 coats @20mil each is required and allow a curing time of minimum 6-7 days.Also application must coat entire surface to above the waterline. • Application on non porous surfaces such as metal or fiberglass : Apply thin coats as this will allow for the product to cure faster. • Cure times are displayed in our curing chart. However if coats have been applied too thick, the surface might feel tacky. This is a sign of trapped moisture. If you have left over product, apply a very thin coat over the entire surface. The surface needs to be fully cured and hard before permitting water. • For applications where SEMCO Liquid Membrane™ is applied on pool plaster, extended curing times might occur as plaster holds more moisture which needs to breath out first. A slight color change may occur when being in contact with water when the product has not fully cured yet. This however will not affect the performance of the SEMCO Liquid Membrane™. • It is always advisable to apply a small test patch in an inconspicuous are to ensure adequate adhesion prior to full application. • If you have multiple containers of SEMCO Liquid Membrane™, we highly recommend to either mix them together or use one container for the last layer to get color consistency.
Prepare your space and Gather your materials
• For bare concrete or water based coatings we recommend our Preparation D in order to remove any mineral deposits or efflorescence from the surface. For this you will need the following cleaners : Nu-Lift Cleaner and Stone Soap • For asphalt, rubber and EPDM surfaces we recommend Preparation B.For this you will need the following cleaners : Power Cleaner and Stone Soap Ensure your surfaces are fully cleaned and dried. If you have any rust on your surface, use a water based rust primer first.
Masking
Mask off areas that are not receiving any coating. Remove masking tape before material has fully cured.
Fabric Reinforcement
We strongly recommend using the Fabric Reinforcement on all the joints.Apply a generous coat of SEMCO Liquid Membrane™ on the joints. 4" on each side of the joint and while product is still wet, put the Fabric Reinforcement over the joint and press it flat. Once Fabric Reinforcement is on, apply another coat of SEMCO Liquid Membrane™ across the Fabric Reinforcement to encapsulate it. Let it dry completely before resuming to next step.
APPLYING COAT
Use a 1/2" nap roller. Allow any pre-treated areas to fully dry. Apply a thin coat (0.015 inch per coat) of SEMCO Liquid Membrane™ with brush or roller over substrate including pre-treated areas. Once you can walk on the surface and not get any residue on your shoe or feet or cannot leave a fingerprint impression it is ready to re-coat. Apply another thin coat of SEMCO Liquid Membrane™ in an alternate direction over the first coat of SEMCO Liquid Membrane™. Let topcoat dry to the touch, approximately 1–2 hours at 70 °F (21 °C) and 50% RH. When last coat has dried to the touch, inspect final surface for pinholes, voids, thin spots or other defects.SEMCO Liquid Membrane™ will dry to a lighter color when it’s dry to touch. Use additional SEMCO Liquid Membrane™ to seal the defects. Required total thickness is 0.03 - 0.04 inches for non submerged applications.
Curing Time
Curing time depends on temperature, humidity and airflow, however typically initial cure is within 6 - 7 days as per specific product recommendations. Avoid contact with water during the curing period.
Additional Information
• For clean up use warm water to clean brush or roller right after use. • For optimal bonding we highly recommend preparing the surface as mentioned above for best results. • Stir up the product well before use in order to mix up the color pigments. • Avoid application in direct sun light in the afternoon or temperatures of over 85F as it might cause the product to dry too fast before it can adhere to the substrate • It can not be applied to wet substrates or substrates still containing moisture, else it will not cure correctly and stay tacky. Max. rest moisture in substrate can be up to 3%. If you are unsure about the moisture content, have it measured prior to application. • Ensuring that a surface is pH balanced before applying a coating is crucial for optimal adhesion and performance. Therefore we recommend our preparation methods for optimal adhesion. We do not recommend acid washes. • Application on non porous surfaces such as metal or fiberglass : Apply thin coats as this will allow for the product to cure faster. • Cure times are displayed in our curing chart. However if coats have been applied too thick, the surface might feel tacky. This is a sign of trapped moisture. If you have left over product, apply a very thin coat over the entire surface. The surface needs to be fully cured and hard before being fully submerged. • It is always advisable to apply a small test patch in an inconspicuous are to ensure adequate adhesion prior to full application. • If you have multiple containers of SEMCO Liquid Membrane™, we highly recommend to either mix them together or use one container for the last layer to get color consistency.
Prepare your space and Gather your materials
• For bare concrete or water based coatings we recommend our Preparation D in order to remove any mineral deposits or efflorescence from the surface. For this you will need the following cleaners : Nu-Lift Cleaner and Stone Soap • For concrete surfaces with oil stains or grease we recommend Preparation B.For this you will need the following cleaners : Power Cleaner and Stone Soap Ensure your surfaces are fully cleaned and dried. Gather all the products and tools needed for your project.
Fabric Reinforcement
If you have any cracks wider than 1/4", a Fabric Reinforcement is needed to bridge the crack. Any cracks smaller than 1/4" width, SEMCO Liquid Membrane™ can be applied over it.
Masking
Mask off areas that are not receiving any coating. Remove masking tape before material has fully cured.
APPLYING COAT
Use a 1/2" nap roller. Allow any pre-treated areas to fully dry. Apply a thin coat (0.015 inch per coat) of SEMCO Liquid Membrane™ with brush or roller over substrate including pre-treated areas. Once you can walk on the surface and not get any residue on your shoe or feet or cannot leave a fingerprint impression it is ready to re-coat. Apply another thin coat of SEMCO Liquid Membrane™ in an alternate direction over the first coat of SEMCO Liquid Membrane™. Let topcoat dry to the touch, approximately 1–2 hours at 70 °F (21 °C) and 50% RH. When last coat has dried to the touch, inspect final surface for pinholes, voids, thin spots or other defects.SEMCO Liquid Membrane™ will dry to a lighter color when it’s dry to touch. Use additional SEMCO Liquid Membrane™ to seal the defects. Required total thickness is 0.03 - 0.04 inches for non submerged applications.
Curing Time
Curing time depends on temperature, humidity and airflow, however typically initial cure is within 6 - 7 days as per specific product recommendations. Avoid contact with water during the curing period.
Additional Information
• It is not recommended to apply any of our products to green concrete. Fresh concrete should be allowed to cure for a minimum of 28 days. • For clean up use warm water to clean brush or roller right after use. • For optimal bonding we highly recommend preparing the surface as mentioned above for best results. • Stir up the product well before use in order to mix up the color pigments. • Avoid application in direct sun light in the afternoon or temperatures of over 85F as it might cause the product to dry too fast before it can adhere to the substrate • Suitable for light foot traffic.For heavy foot traffic or vehicle traffic, we recommend using SEMCO Titan Shield. • It can not be applied to wet substrates or substrates still containing moisture, else it will not cure correctly and stay tacky. Max. rest moisture in substrate can be up to 3%. If you are unsure about the moisture content, have it measured prior to application. • Ensuring that a surface is pH balanced before applying a coating is crucial for optimal adhesion and performance. Therefore we recommend our preparation methods for optimal adhesion. We do not recommend acid washes. • For applications where the product is fully submerged, 3 coats @20mil each is required and allow a curing time of minimum 6-7 days.Also application must coat entire surface to above the waterline. • Application on non porous surfaces such as metal or fiberglass : Apply thin coats as this will allow for the product to cure faster. • Cure times are displayed in our curing chart. However if coats have been applied too thick, the surface might feel tacky. This is a sign of trapped moisture. If you have left over product, apply a very thin coat over the entire surface. The surface needs to be fully cured and hard before permitting water. • For applications where SEMCO Liquid Membrane™ is applied on pool plaster, extended curing times might occur as plaster holds more moisture which needs to breath out first. A slight color change may occur when being in contact with water when the product has not fully cured yet. This however will not affect the performance of the SEMCO Liquid Membrane™. • It is always advisable to apply a small test patch in an inconspicuous are to ensure adequate adhesion prior to full application. • If you have multiple containers of SEMCO Liquid Membrane™, we highly recommend to either mix them together or use one container for the last layer to get color consistency.
Prepare your space and Gather your materials
• Use SEMCO Nu-Lift Cleaner and Stone Soap to remove any mineral deposits or efflorescence • Use SEMCO Power Cleaner and SEMCO Nu-Lift Cleaner if there is any oil or grease Ensure your surfaces are fully cleaned and dried. Gather all the products and tools needed for your project.
Masking
Mask off areas that are not receiving any coating. Remove masking tape before material has fully cured.
Titan Shield Application
Use a 1/2" woven nap roller to apply Titan Shield Gloss. Apply the first coat and allow the sealer to dry for at least 30 - 45 minutes, up to 2 hrs in high humidity conditions, or until surface is completely dry. Repeat the application to a minimum of 3 coats or a total thickness of 15-20 mil. Additional coats may be required depending on the porosity of your substrate. For larger areas Titan Shield Gloss can be applied with an airless sprayer with tip size 17. Adjust the sprayer to the lowest possible air setting and try out on a test area first.
Additional Information
• For clean up use warm water to clean brush or roller right after use. • For optimal bonding we highly recommend preparing the surface as mentioned above for best results. • Stir up the product well before use in order to mix up the color pigments. • Avoid application in direct sun light in the afternoon or temperatures of over 85F as it might cause the product to dry too fast before it can adhere to the substrate • It can not be applied to wet/damp substrates or substrates still containing moisture, else it will not cure correctly and stay tacky. Max. rest moisture in substrate can be up to 3%. If you are unsure about the moisture content, have it measured prior to application. • Ensuring that a surface is pH balanced before applying a coating is crucial for optimal adhesion and performance. Therefore we recommend our preparation methods for optimal adhesion. We do not recommend acid washes. • It is always advisable to apply a small test patch in an inconspicuous are to ensure adequate adhesion prior to full application.
Prepare your space and Gather your materials
• Use SEMCO Nu-Lift Cleaner and Stone Soap to remove any mineral deposits or efflorescence • Use SEMCO Power Cleaner and SEMCO Nu-Lift Cleaner if there is any oil or grease Ensure your surfaces are fully cleaned and dried. Gather all the products and tools needed for your project.
Masking
Mask off areas that are not receiving any coating. Remove masking tape before material has fully cured.
Titan Shield Application
Use a 1/2" woven nap roller to apply Titan Shield Gloss. Apply the first coat and allow the sealer to dry for at least 30 - 45 minutes, up to 2 hrs in high humidity conditions, or until surface is completely dry. Repeat the application to a minimum of 3 coats or a total thickness of 15-20 mil. Additional coats may be required depending on the porosity of your substrate. For larger areas Titan Shield Gloss can be applied with an airless sprayer with tip size 17. Adjust the sprayer to the lowest possible air setting and try out on a test area first.
Additional Information
• For clean up use warm water to clean brush or roller right after use. • For optimal bonding we highly recommend preparing the surface as mentioned above for best results. • Stir up the product well before use in order to mix up the color pigments. • Avoid application in direct sun light in the afternoon or temperatures of over 85F as it might cause the product to dry too fast before it can adhere to the substrate • It can not be applied to wet/damp substrates or substrates still containing moisture, else it will not cure correctly and stay tacky. Max. rest moisture in substrate can be up to 3%. If you are unsure about the moisture content, have it measured prior to application. • Ensuring that a surface is pH balanced before applying a coating is crucial for optimal adhesion and performance. Therefore we recommend our preparation methods for optimal adhesion. We do not recommend acid washes. • If SEMCO Liquid Membrane has been applied prior, let it cure for a minimum of 4 days prior to applying Titan Shield.
Prepare your space and Gather your materials
• Use SEMCO Nu-Lift Cleaner and Stone Soap to remove any mineral deposits or efflorescence • Use SEMCO Power Cleaner and SEMCO Nu-Lift Cleaner if there is any oil or grease Ensure your surfaces are fully cleaned and dried. Gather all the products and tools needed for your project.
Masking
Mask off areas that are not receiving any coating. Remove masking tape before material has fully cured.
Titan Shield Application
Use a 1/2" woven nap roller to apply Titan Shield Gloss. Apply the first coat and allow the sealer to dry for at least 30 - 45 minutes, up to 2 hrs in high humidity conditions, or until surface is completely dry. Repeat the application to a minimum of 3 coats or a total thickness of 15-20 mil. Additional coats may be required depending on the porosity of your substrate. For larger areas Titan Shield Gloss can be applied with an airless sprayer with tip size 17. Adjust the sprayer to the lowest possible air setting and try out on a test area first.
Additional Information
• For clean up use warm water to clean brush or roller right after use. • For optimal bonding we highly recommend preparing the surface as mentioned above for best results. • Stir up the product well before use in order to mix up the color pigments. • Avoid application in direct sun light in the afternoon or temperatures of over 85F as it might cause the product to dry too fast before it can adhere to the substrate • It can not be applied to wet/damp substrates or substrates still containing moisture, else it will not cure correctly and stay tacky. Max. rest moisture in substrate can be up to 3%. If you are unsure about the moisture content, have it measured prior to application. • Ensuring that a surface is pH balanced before applying a coating is crucial for optimal adhesion and performance. Therefore we recommend our preparation methods for optimal adhesion. We do not recommend acid washes. • If SEMCO Liquid Membrane has been applied prior, let it cure for a minimum of 4 days prior to applying Titan Shield. • Cure times are displayed in our curing chart.
Prepare your space and Gather your materials
• Use Nu-Lift Cleaner and Stone Soap to remove any mineral deposits or efflorescence Ensure your surfaces are fully cleaned and dried. Gather all the products and tools needed for your project.
Masking
Mask off areas that are not receiving any coating. Remove masking tape before material has fully cured.
Natural Shield Application
Use a 1/4" woven nap roller to apply Natural Shield. Apply the first coat and do not allow sealer to completely dry before applying second and third coats.Repeat the application to a minimum of 3 coats. Additional coats may be required depending on the porosity of your substrate. For larger areas Natural Shield can be applied with an airless sprayer with tip size 17. Adjust the sprayer to the lowest possible air setting and try out on a test area first.
Additional Information
• For clean up use warm water to clean brush or roller right after use. • No existing coating can be on the surface else Natural Shield cannot penetrate into the substrate. • Ensuring that a surface is pH balanced before applying a coating is crucial for optimal adhesion and performance. Therefore we recommend our preparation methods for optimal adhesion. We do not recommend acid washes. • Avoid application in direct sun light in the afternoon or temperatures of over 85F as it might cause the product to dry too fast before it can adhere to the substrate
Prepare your space and Gather your materials
• Use Nu-Lift Cleaner and Stone Soap to remove any mineral deposits or efflorescence • Use Power Cleaner and Nu-Lift Cleaner if there is any oil or grease Ensure your surfaces are fully cleaned and dried. Gather all the products and tools needed for your project.
Masking
Mask off areas that are not receiving any coating. Remove masking tape before material has fully cured.
Natural Shield Application
Use a 1/4" woven nap roller to apply Natural Shield. Apply the first coat and do not allow sealer to completely dry before applying second and third coats.Repeat the application to a minimum of 3 coats. Additional coats may be required depending on the porosity of your substrate. For larger areas Natural Shield can be applied with an airless sprayer with tip size 17. Adjust the sprayer to the lowest possible air setting and try out on a test area first.
Additional Information
• For clean up use warm water to clean brush or roller right after use. • For optimal bonding we highly recommend preparing the surface as mentioned above for best results. • No existing coating can be on the surface else Natural Shield cannot penetrate into the substrate. • Ensuring that a surface is pH balanced before applying a coating is crucial for optimal adhesion and performance. Therefore we recommend our preparation methods for optimal adhesion. We do not recommend acid washes. • Avoid application in direct sun light in the afternoon or temperatures of over 85F as it might cause the product to dry too fast before it can adhere to the substrate
Prepare your space and Gather your materials
Ensure your surface is free of any debris. Gather all the products and tools needed for your project.
WASHING PROCESS
• Mix 1 part Stone Soap with 4 parts of water • Slightly dampen the surface with water. This will prevent cleaners to penetrate deep into the pores of the substrate • Apply the Stone Soap mixture lightly with a pump sprayer and allow to sit for 2-3 minutes • Scrub the surface using a scrub machine or nylon brush • Rinse the surface off well and ensure no residue is left
Additional Information
• Always let surface completely dry prior to application of sealers • Do not use Muriatic Acid to prep surfaces as residue may lead to adhesion problems • Ensuring that a surface is pH balanced before applying a coating is crucial for optimal adhesion and performance. Therefore we recommend our preparation methods for optimal adhesion. We do not recommend acid washes.
Prepare your space and Gather your materials
Ensure your surface is free of any debris. Gather all the products and tools needed for your project.
WASHING PROCESS
• Mix 1 part Stone Soap with 4 parts of water • Mix 1 part POWER CLEANER with 4 parts of water • Slightly dampen the surface with water. This will prevent cleaners to penetrate deep into the pores of the substrate • Apply the POWER CLEANER mixture lightly with a pump sprayer and allow to sit for 2-3 minutes • Scrub the surface using a scrub machine or nylon brush • Rinse the surface off well and ensure no residue is left • Repeat all steps in this task with Stone Soap to clean chemical residue
Additional Information
• Always let surface completely dry prior to application of sealers • Do not use Muriatic Acid to prep surfaces as residue may lead to adhesion problems
Prepare your space and Gather your materials
Ensure your surface is free of any debris. Gather all the products and tools needed for your project.
WASHING PROCESS
• Mix 1 part POWER CLEANER with 4 parts of water for POWER CLEANER SOLUTION 1 • Mix 1 part POWER CLEANER with 9 parts of water for POWER CLEANER SOLUTION 2 • Mix 1 part Nu-Lift CLEANER with 1 part of water • Slightly dampen the surface with water. This will prevent cleaners to penetrate deep into the pores of the substrate • Apply the POWER CLEANER SOLUTION 1 mixture lightly with a pump sprayer and allow to sit for 2-3 minutes • Scrub the surface using a scrub machine or nylon brush • Rinse the surface off well and ensure no residue is left • Apply Nu-Lift Cleaner solution and repeat all steps. • Apply POWER CLEANER SOLUTION 2 and repeat steps for the procedure
Additional Information
• Always let surface completely dry prior to application of sealers • Do not use Muriatic Acid to prep surfaces as residue may lead to adhesion problems
Prepare your space and Gather your materials
Ensure your surface is free of any debris. Gather all the products and tools needed for your project.
WASHING PROCESS
• Slightly wet surface with water prior to applying Nu-Lift Cleaner • Apply undiluted Nu-Lift Cleaner on to the surface. and allow to sit for 2-3 minutes • Scrub the surface using a scrub machine or nylon brush • Rinse the surface off well and ensure no residue is left • Mix 1 part Stone Soap with 4 parts of water and allow to sit for 2-3 minutes • Scrub the surface using a scrub machine or nylon brush • Rinse the surface off well and ensure no residue is left
Additional Information
• Always let surface completely dry prior to application of sealers • Do not use Muriatic Acid to prep surfaces as residue may lead to adhesion problems
Prepare your surface and Gather your materials
• Use SEMCO Nu-Lift Cleaner and Stone Soap to remove any mineral deposits or efflorescence • Use SEMCO Power Cleaner and SEMCO Nu-Lift Cleaner if there is any oil or grease Ensure your surfaces are fully cleaned and dried. Gather all the products and tools needed for your project.
Masking
Mask off areas that are not receiving any coating. Remove masking tape before material has fully cured.
PRESTAIN APPLICATION
• Apply PreStain Color with sponge, brush, foam roller or airless sprayer with tip size 17 • Apply thin and even coats on to concrete. Do not overload application tool with product and avoid leaving puddles on the surface. • Repeat application if more color saturation is required. • Let it dry for 12 - 24 hours depending on temperature before applying sealer for added protection.
Additional Information
• Must apply between 40-90˚F (4.5-32˚C). Do not use if rain is expected within 24 hours. The concrete surface must be completely dry before application. • Work in small sections lightly saturating the surface and immediately back-brush or use pad applicator to eliminate puddling, remove excess and evenly distribute PreStain. • Over application of stain will lead to surface failure including peeling and cracking. • Stir up the product well before use in order to mix up the color pigments. • For areas with furniture or heavy foot traffic we recommend using Titan Shield Sealer to protect the surface.
Prepare your Non-Skid Additive
• Lightly shake the Non-Skid container prior to mixing • Empty Non-Skid container into Titan Shield Gloss sealer and mix up well.
Titan Shield Application
Use a 1/2" woven nap roller to apply Titan Shield Gloss. Apply the first coat and allow the sealer to dry for at least 30 - 45 minutes, up to 2 hrs in high humidity conditions, or until surface is completely dry. Repeat the application to a minimum of 3 coats or a total thickness of 15-20 mil. Additional coats may be required depending on the porosity of your substrate. For larger areas Titan Shield Gloss can be applied with an airless sprayer with tip size 17. Adjust the sprayer to the lowest possible air setting and try out on a test area first.
Additional Information
• If Non-Skid Additive is used with clear Titan Shield, spray application is recommended • For roller application Titan Shield with color is recommended • Avoid application in direct sun light in the afternoon or temperatures of over 85F as it might cause the product to dry too fast before it can adhere to the substrate • It can not be applied to wet substrates or substrates still containing moisture, else it will not cure correctly and stay tacky. Max. rest moisture in substrate can be up to 3%. If you are unsure about the moisture content, have it measured prior to application. • Cure times are displayed in our curing chart.
Prepare your space and gather your materials
• Use SEMCO Nu-Lift Cleaner and Stone Soap to remove any mineral deposits or efflorescence • Use SEMCO Power Cleaner and SEMCO Nu-Lift Cleaner if there is any oil or grease Ensure your surfaces are fully cleaned and dried. Gather all the products and tools needed for your project.
Masking
Mask off areas that are not receiving any coating. Remove masking tape before material has fully cured.
SEMCO Sealer MATTE Application
Use a 1/4" woven nap roller to apply SEMCO Sealer Matte. Apply the first coat and allow the sealer to dry for at least 30 - 45 minutes, up to 2 hrs in high humidity conditions, or until surface is completely dry. Repeat the application to a minimum of 2 coats or a total thickness of 6-8 mil. Additional coats may be required depending on the porosity of your substrate. For larger areas SEMCO Sealer Matte can be applied with an airless sprayer with tip size 17. Adjust the sprayer to the lowest possible air setting and try out on a test area first.
Additional Information
• For clean up use warm water to clean brush or roller right after use. • For optimal bonding we highly recommend preparing the surface as mentioned above for best results. • Stir up the product well before use in order to mix up the color pigments. • Avoid application in direct sun light in the afternoon or temperatures of over 85F as it might cause the product to dry too fast before it can adhere to the substrate • It can not be applied to wet/damp substrates or substrates still containing moisture, else it will not cure correctly and stay tacky. Max. rest moisture in substrate can be up to 3%. If you are unsure about the moisture content, have it measured prior to application. • Ensuring that a surface is pH balanced before applying a coating is crucial for optimal adhesion and performance. Therefore we recommend our preparation methods for optimal adhesion. We do not recommend acid washes. • If SEMCO Liquid Membrane has been applied prior, let it cure for a minimum of 4 days prior to applying SEMCO Sealer Matte. • Cure times are displayed in our curing chart.
Easy Application
Ensure your surface is free of any debris. Gather all the products and tools needed for your project. • If there are any existing wax coatings, please remove prior to application • Use household microfiber mop for application • Pour small amount onto clean surface apply thin coat with microfiber mop. Apply small sections at a time. On wood floors or laminate flooring, apply in the directions of the individual planks.
Additional Information
• If you miss a spot, wait until floor is dry and pour Crystal Coat onto clean microfiber cloth and touch up spot. • Only use when temperatures are above 50F. Allow to dry for 45 minutes before walking on the floor. • Only place heavy objects once surface has cured for 24 hours. • A 2nd coat can be applied if desired. Apply only once floor is dry enough to walk on without any imprints.
Prepare your surface and Gather your materials
• For Cement / Hardiebacker board applications, ensure that boards are properly installed and sound.
Fabric Reinforcement
For any joints between the boards and the joint between floor and wall, we recommend using the Fabric Reinforcement. To apply the Fabric Reinforcement, apply a generous coat of SEMCO Liquid Membrane™ over the crack. Put the Fabric Reinforcement on a press it flat, after 10-15 min apply another coat of SEMCO Liquid Membrane™ over the Fabric Reinforcement to encapsulate it. Let it dry to the touch before applying SEMCO Liquid Membrane™ over the entire surface.
Masking
Mask off areas that are not receiving any coating. Remove masking tape before material has fully cured.
APPLYING COAT
Use a 1/2" nap roller. Allow any pre-treated areas to fully dry. Apply a thin coat (0.015 inch per coat) of SEMCO Liquid Membrane™ with brush or roller over substrate including pre-treated areas. Once you can walk on the surface and not get any residue on your shoe or feet or cannot leave a fingerprint impression it is ready to re-coat. Apply another thin coat of SEMCO Liquid Membrane™ in an alternate direction over the first coat of SEMCO Liquid Membrane™. Let topcoat dry to the touch, approximately 1–2 hours at 70 °F (21 °C) and 50% RH. When last coat has dried to the touch, inspect final surface for pinholes, voids, thin spots or other defects.SEMCO Liquid Membrane™ will dry to a lighter color when it’s dry to touch. Use additional SEMCO Liquid Membrane™ to seal the defects. Required total thickness is 0.03 - 0.04 inches for non submerged applications.
Curing Time
Curing time depends on temperature, humidity and airflow, however typically initial cure is within 6 - 7 days as per specific product recommendations. If SEMCO Liquid Membrane is used as a primary waterproofing, you can tile over the next day with regular tile adhesive of your choice.
Prepare your surface and Gather your materials
• For metal surfaces we recommend our Preparation D in order to chemically etch the surface prior to application. For this you will need the following cleaners : Nu-Lift Cleaner and Stone Soap Ensure your surfaces are fully cleaned and dried. Gather all the products and tools needed for your project.
Fabric Reinforcement
If you have any joints, Fabric Reinforcement is needed to bridge the joint. To apply the Fabric Reinforcement, apply a generous coat of SEMCO Liquid Membrane™ over the crack. Put the Fabric Reinforcement on a press it flat, after 10-15 min apply another coat of SEMCO Liquid Membrane™ over the Fabric Reinforcement to encapsulate it. Let it dry to the touch before applying SEMCO Liquid Membrane™ over the entire surface.
Masking
Mask off areas that are not receiving any coating. Remove masking tape before material has fully cured.
APPLYING COAT
Use a 1/2" nap roller. Allow any pre-treated areas to fully dry. Apply a thin coat (0.015 inch per coat) of SEMCO Liquid Membrane™ with brush or roller over substrate including pre-treated areas. Once you can walk on the surface and not get any residue on your shoe or feet or cannot leave a fingerprint impression it is ready to re-coat. Apply another thin coat of SEMCO Liquid Membrane™ in an alternate direction over the first coat of SEMCO Liquid Membrane™. Let topcoat dry to the touch, approximately 1–2 hours at 70 °F (21 °C) and 50% RH. When last coat has dried to the touch, inspect final surface for pinholes, voids, thin spots or other defects.SEMCO Liquid Membrane™ will dry to a lighter color when it’s dry to touch. Use additional SEMCO Liquid Membrane™ to seal the defects. Required total thickness is 0.03 - 0.04 inches for non submerged applications.
Curing Time
Curing time depends on temperature, humidity and airflow, however typically initial cure is within 6 - 7 days as per specific product recommendations.
Additional Information
• For clean up use warm water to clean brush or roller right after use. • For optimal bonding we highly recommend preparing the surface as mentioned above for best results. • Stir up the product well before use in order to mix up the color pigments. • Avoid application in direct sun light in the afternoon or temperatures of over 85F as it might cause the product to dry too fast before it can adhere to the substrate • Suitable for light foot traffic.For heavy foot traffic or vehicle traffic, we recommend using SEMCO Titan Shield Gloss. • It can not be applied to wet substrates or substrates still containing moisture, else it will not cure correctly and stay tacky. Max. rest moisture in substrate can be up to 3%. If you are unsure about the moisture content, have it measured prior to application. • Ensuring that a surface is pH balanced before applying a coating is crucial for optimal adhesion and performance. Therefore we recommend our preparation methods for optimal adhesion. We do not recommend acid washes. • For applications where the product is fully submerged, 3 coats @20mil each is required and allow a curing time of minimum 6-7 days.Also application must coat entire surface to above the waterline. • Application on non porous surfaces such as metal or fiberglass : Apply thin coats as this will allow for the product to cure faster. • Cure times are displayed in our curing chart. However if coats have been applied too thick, the surface might feel tacky. This is a sign of trapped moisture. If you have left over product, apply a very thin coat over the entire surface. The surface needs to be fully cured and hard before permitting water. • For applications where SEMCO Liquid Membrane™ is applied on pool plaster, extended curing times might occur as plaster holds more moisture which needs to breath out first. A slight color change may occur when being in contact with water when the product has not fully cured yet. This however will not affect the performance of the SEMCO Liquid Membrane™. • It is always advisable to apply a small test patch in an inconspicuous are to ensure adequate adhesion prior to full application. • If you have multiple containers of SEMCO Liquid Membrane™, we highly recommend to either mix them together or use one container for the last layer to get color consistency.
Need Assistance?
CALL OR EMAIL US AT: 1-833-211-2297 info@semcoworks.com


